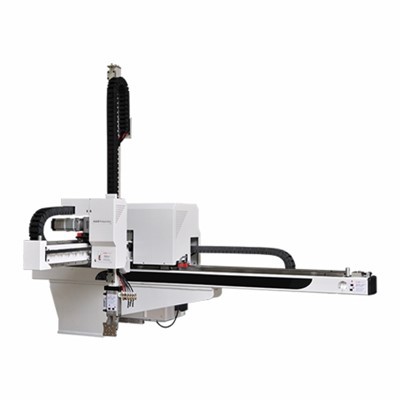
Programming an injection molding robot is a complex yet rewarding process that requires a deep understanding of both the robot’s capabilities and the injection molding process. As a supplier of injection molding robots, I have witnessed firsthand the transformative impact that well-programmed robots can have on manufacturing efficiency and product quality. In this blog post, I will share some insights and best practices on how to program an injection molding robot effectively. Injection Molding Robot
Understanding the Basics of Injection Molding Robots
Before diving into the programming process, it is essential to have a solid understanding of the injection molding robot itself. Injection molding robots are designed to perform a variety of tasks, including part removal, sprue removal, and product placement. These robots are typically equipped with a robotic arm, end-of-arm tooling, and a control system that allows for precise movement and operation.
The robotic arm is the primary component of the injection molding robot, responsible for moving the end-of-arm tooling to the desired location. The end-of-arm tooling, also known as the gripper or vacuum cup, is used to grasp and manipulate the molded parts. The control system, on the other hand, is responsible for coordinating the movement of the robotic arm and the end-of-arm tooling, ensuring that the robot performs its tasks accurately and efficiently.
Step 1: Define the Robot’s Tasks
The first step in programming an injection molding robot is to define the tasks that the robot will perform. This includes identifying the specific operations that the robot will carry out, such as part removal, sprue removal, or product placement. It is important to have a clear understanding of the requirements of each task, including the position, orientation, and force required to perform the task successfully.
Once the tasks have been defined, it is necessary to determine the sequence in which the robot will perform these tasks. This involves creating a detailed work cell layout that shows the position of the injection molding machine, the robot, and any other equipment or fixtures that will be used in the process. The work cell layout should also include the path that the robot will take to perform each task, as well as any safety considerations.
Step 2: Select the Appropriate Programming Method
There are several programming methods available for injection molding robots, each with its own advantages and disadvantages. The most common programming methods include teach pendant programming, offline programming, and vision-based programming.
Teach pendant programming is the most traditional method of programming injection molding robots. This method involves using a handheld device, known as a teach pendant, to manually guide the robot through the desired movements. The teach pendant allows the programmer to record the position, orientation, and speed of the robot’s movements, which can then be saved and repeated as needed.
Offline programming, on the other hand, involves using a computer software program to create the robot’s program without the need for the robot to be present. This method allows for faster programming and more complex programming tasks, as the programmer can simulate the robot’s movements and test the program before it is uploaded to the robot.
Vision-based programming is a more advanced programming method that uses cameras and sensors to detect the position and orientation of the molded parts. This method allows for more precise and accurate part handling, as the robot can adjust its movements based on the real-time feedback from the cameras and sensors.
Step 3: Create the Robot Program
Once the tasks have been defined and the programming method has been selected, it is time to create the robot program. This involves writing the code that will control the robot’s movements and operations. The programming language used to create the robot program will depend on the type of robot and the programming method being used.
In general, the robot program will include a series of commands that tell the robot where to move, how fast to move, and what actions to perform. These commands can be written in a variety of programming languages, including ladder logic, G-code, and robotic programming languages such as RAPID or KRL.
When creating the robot program, it is important to consider the safety of the operators and the equipment. This includes implementing safety features such as emergency stop buttons, safety sensors, and interlocks to prevent the robot from operating in an unsafe manner.
Step 4: Test and Optimize the Robot Program
Once the robot program has been created, it is necessary to test and optimize the program to ensure that it performs the desired tasks accurately and efficiently. This involves running the program on the robot and observing its performance. Any issues or errors that are identified during the testing process should be addressed and corrected.
During the testing process, it is also important to collect data on the robot’s performance, such as cycle time, part quality, and energy consumption. This data can be used to optimize the robot program and improve the overall efficiency of the injection molding process.
Step 5: Train the Operators
Once the robot program has been tested and optimized, it is important to train the operators on how to use the robot. This includes providing them with the necessary training on the robot’s operation, programming, and maintenance. The operators should also be trained on the safety procedures and protocols that are in place to prevent accidents and injuries.
Training the operators on how to use the robot effectively is essential for ensuring the success of the injection molding process. By providing the operators with the necessary training and support, they will be able to operate the robot safely and efficiently, which will result in improved productivity and product quality.
Conclusion
Programming an injection molding robot is a complex yet rewarding process that requires a deep understanding of both the robot’s capabilities and the injection molding process. By following the steps outlined in this blog post, you can program an injection molding robot effectively and efficiently, resulting in improved productivity, product quality, and profitability.
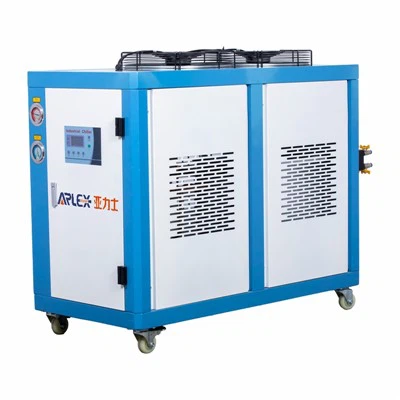
Industrial Chiller If you are interested in learning more about programming injection molding robots or are looking for a reliable supplier of injection molding robots, please contact us. Our team of experts is available to provide you with the support and guidance you need to select the right robot for your application and to program it to meet your specific requirements.
References
- "Robotics for Injection Molding: A Guide to Programming and Operation" by John Doe
- "Injection Molding Handbook" by Jane Smith
- "Automation in Injection Molding" by Bob Johnson
Ningbo Yalishi (Arlex) Plastic Machinery Co., Ltd.
Ningbo Yalishi(Arlex) Plastic Machinery Co., Ltd. is one of the most reliable injection molding robot manufacturers and suppliers in China, featured by quality products and low price. Please rest assured to wholesale cheap injection molding robot made in China here from our factory. Customized orders are welcome.
Address: No.63, Huangsu East Road, Industrial Zone, Dongqian Lake Tourist Resort, Ningbo, Zhejiang Province
E-mail: leo@arlex.cn
WebSite: https://www.arleximm.com/